-
5 Tips to Improve Your Landscape Photography
Photography
Carel Loubser
8/11/2021
Africa is not all about wildlife, but also its breath-taking landscapes. Many times you will return home and you wish you were able to share an incredible sunset , or the uncountable herd of zebra crossing the horizon or the sheer vastness of the Namibia desert landscapes with your friends – because, words are just not enough to describe the feeling that you had a that specific moment… a feeling of all the stress leaving your body and soaking into the African dirt, a weight lifted off your shoulders – within that moment you forget all your worries.
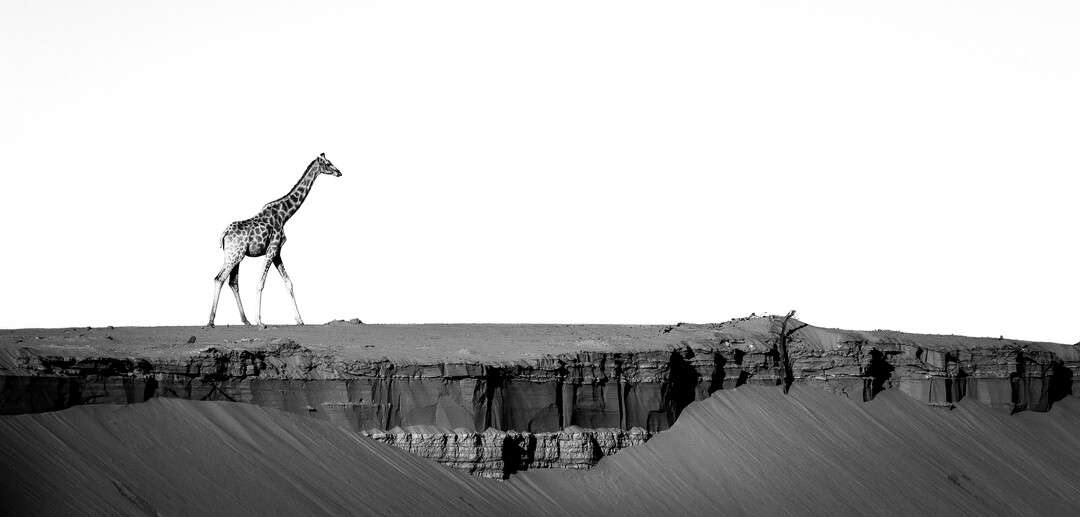
"Giraffe desert walk" by Carel Loubser
Here I provide a few tips that will allow you to capture that perfect landscape scene on camera.
The Golden Rule – Time of Day
Most professional photographers will tell you that the best time for landscape photography is during the golden hours of the day – 15 to 30 minutes before sunrise and 30 minutes to an hour after sunrise, and then 15 to 30 minutes before sunset up to 30 minutes after sunset.
This is the only time of the day that you get the soft, warm light and soft shadows that provide professional quality lighting for landscape photography.
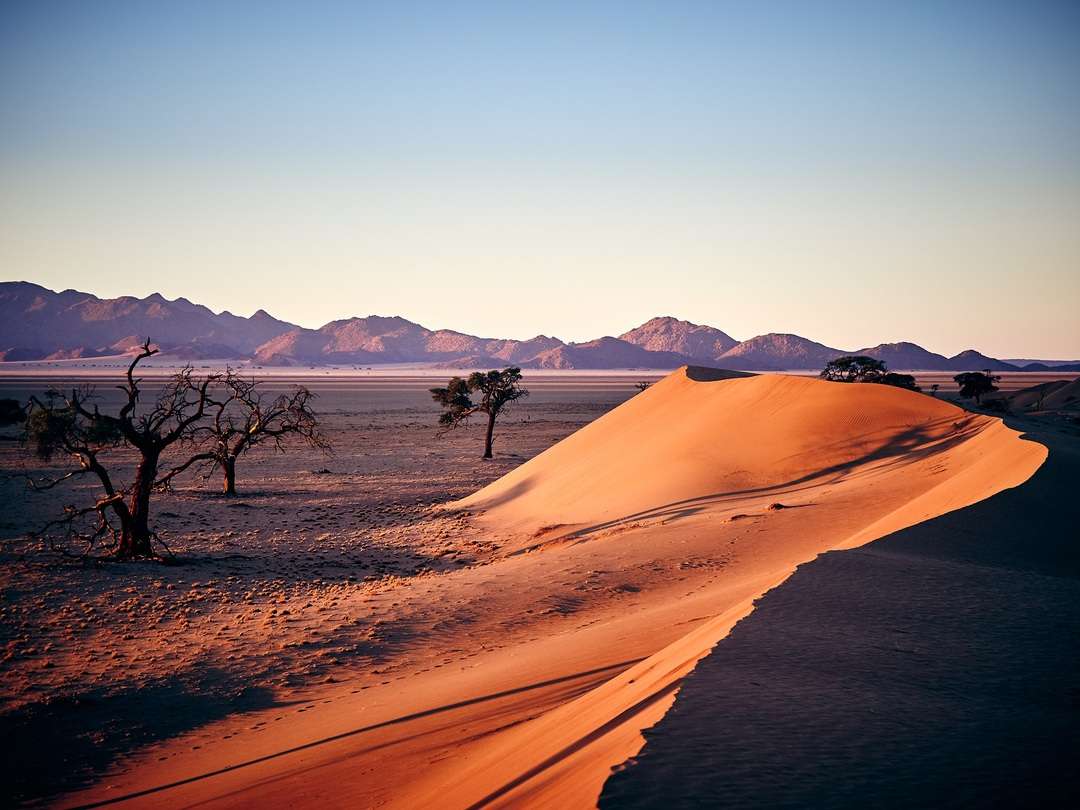
"Namib Sunrise" by Martin Groth
It takes time to find the perfect location, and to make sure you set up the camera in the right location to get the perfect scene. Time that you do not always have during your African safari. Unless your aim is to get your photograph published in “National Geographic”, you can break this Golden Rule, and rather take the opportunity that presents itself at that specific moment. A dramatic desert scene in the late morning can be just as awe-inspiring as the most beautiful sunset over the Zambezi. In the end it is about taking the opportunity to capture the scene at the specific moment that made you stop and say WOW!
Tripod or Not?
The professional landscape photographer will also tell you that you need to shoot landscapes using a tripod. If you are going to follow the Golden Rule, unfortunately that is the truth. The only way you can get high quality images during low light conditions is to make sure your camera is as stable as possible. Unfortunately, carrying a large tripod throughout your African safari is not always the most sensible thing – one more uncomfortable piece of luggage to worry about, especially when you are limited to 20 kg of luggage and travelling from camp to camp.
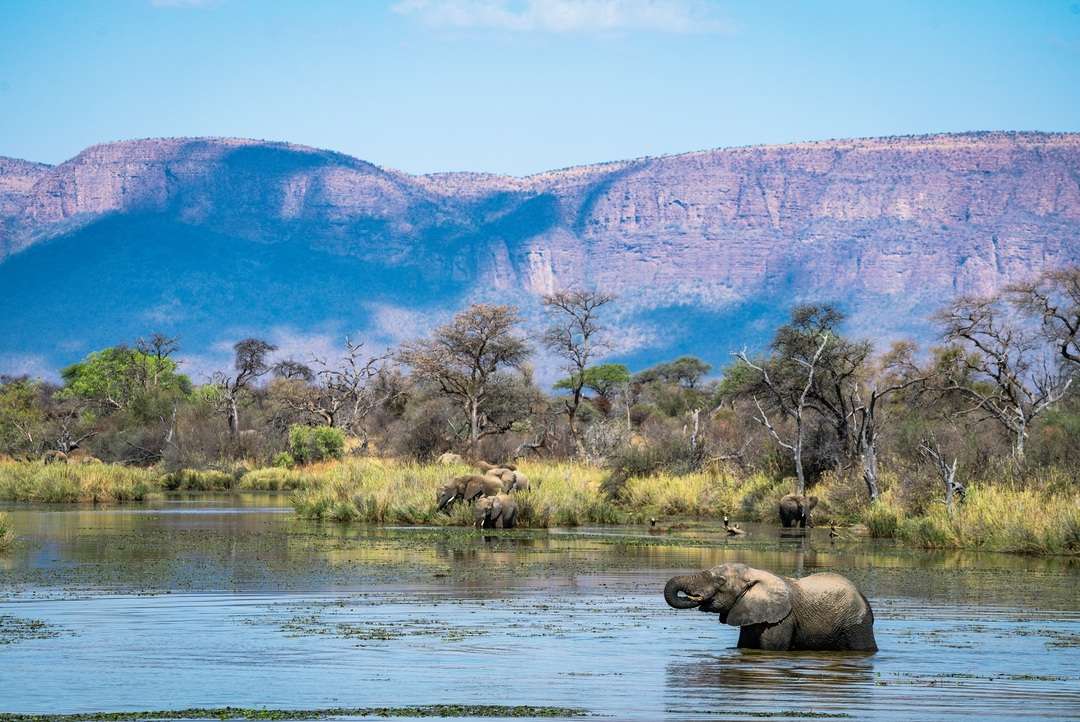
"An elephants playground" by Chris Renshaw
What are my options, you wonder. I would suggest travelling with a light bean bag. You will be able to place this bean bag on another object like a fallen tree or the bonnet of your game drive vehicle. The bean bag will also come in handy during your game drives and during any visits to a hide. If you are not carrying a large camera, a small “gorilla” tripod can also work. With the flexible legs you can easily set up your camera on any uneven surface. You can even wrap the legs around the frame of your game drive vehicle or a tree branch.
The Horizon
One of the most important rules of photography is the two-thirds rule. The same applies to landscape photography. Always make sure that you do not make the rookie mistake of placing the horizon in the dead centre of the photo. It is important that you decide which area you want to emphasise – the sky or the ground. If you have a great looking sky, place the horizon at the bottom third of your photo and the reverse if you want to place focus on the ground.
"Dune snake" by Carel Loubser
Also make sure that your horizon is straight. Yes, you can fix your horizon during post-editing, but you will lose some of your scene. Most cameras include a virtual horizon feature. There are small gizmos that you can add to camera where you add your flash.
Using a Wide-Angle Lens
How often have you come home from a safari and are disappointed that your landscape photographs do not reflect the depth and feeling of being there. To avoid this disappointment, I would suggest you buy a super-wide angle lens if you want to capture as much of the scene as possible. If you do not want to limit yourself to a fixed 12 mm lens, a 14-24 mm zoom lens will give you more flexibility.
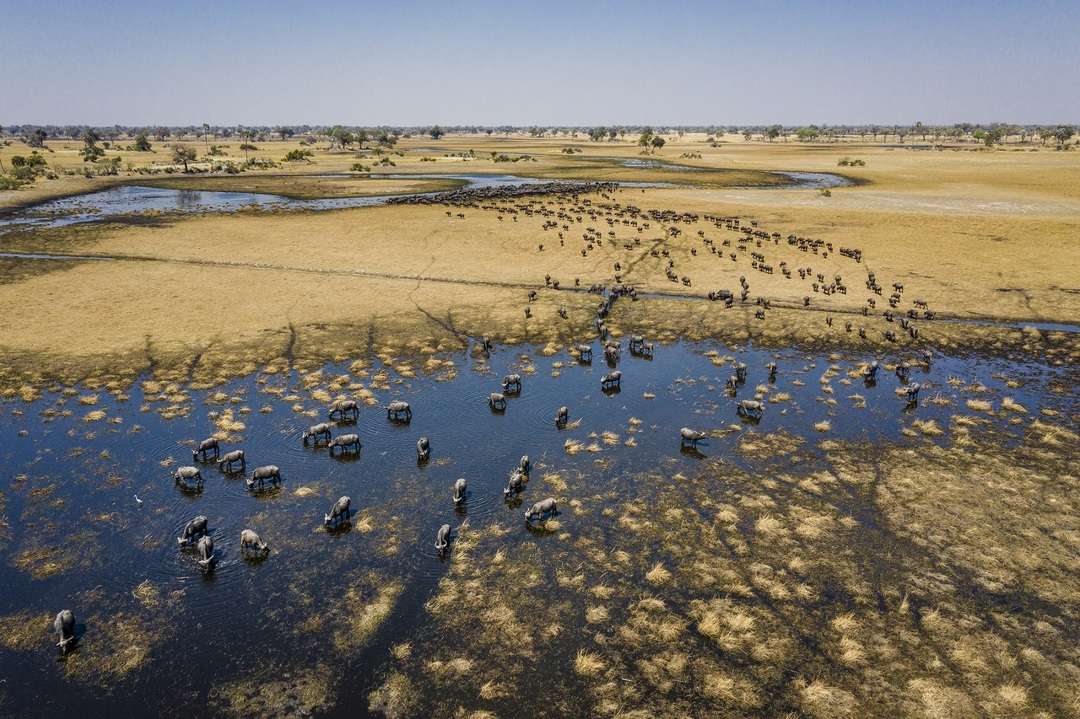
"Buffalo herd Okavango Delta" by Peter & Beverly Pickford
Another way to approach landscape photography is to capture it all by deliberately focusing on only a portion of the scene. This can be just as powerful as trying to fit in everything, especially in those scenes without a clear subject.
Panorama Landscapes
Most mobile phone camera options include a setting that will allow you to capture a panorama, a 180-degree view of the scene. Very easy to do, but unfortunately it will not allow you to print the beautiful panorama at a good size to frame it. You can do the same with your camera by following these few easy steps.
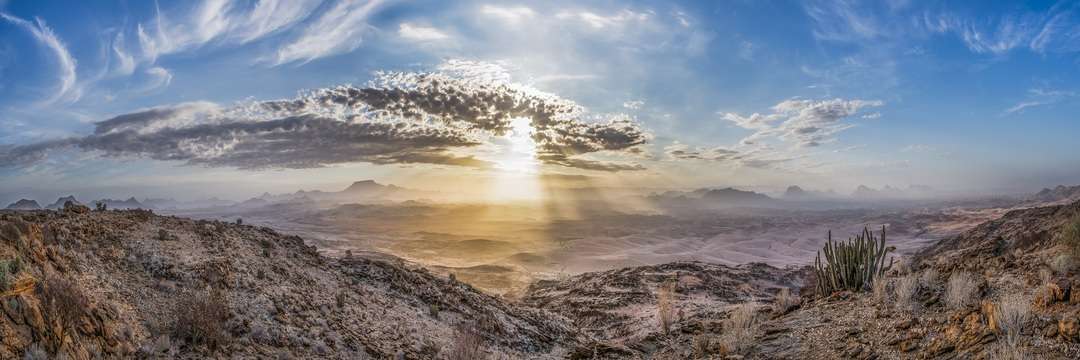
“Early Morning in the Namib’s Valley of a Thousand Hills” by Jo Bogaerts
1. You will require a tripod – you can probably do this shooting out of hand, but you will most likely lose more of your scene when you stitch your images together if you do not keep all the segments on the same horizontal line.
2. Shoot vertically – it will require you to take a few more images than doing it horizontally, but you will have less edge distortion and a better looking panorama.
3. Make sure your camera’s white balance is set on Cloudy to avoid your white balancing changing between segments.
4. Press your shutter button halfway down to set your exposure and make a note of the f-stop and shutter speed. To avoid your exposure changing for one or more segments switch your dial to manual mode in that f-stop and shutter speed.
5. Focus on your first segment and turn off the auto focus of your lens to avoid the camera refocusing on each segment.
6. Overlap each segment by 20-25% to allow your stitching software to match the photos up.
7. It’s important to shoot fairly quickly to avoid, for example, clouds, to move into your landscape
To avoid any camera movement you can use a shutter release or a self-timer to prevent any of the segments being blurred.
You will most likely capture the scene a few times. Make sure to first photograph another object, like placing your finger in front of the lens, and again once you have completed the sequence. This way, you will know where your panorama starts and finishes.
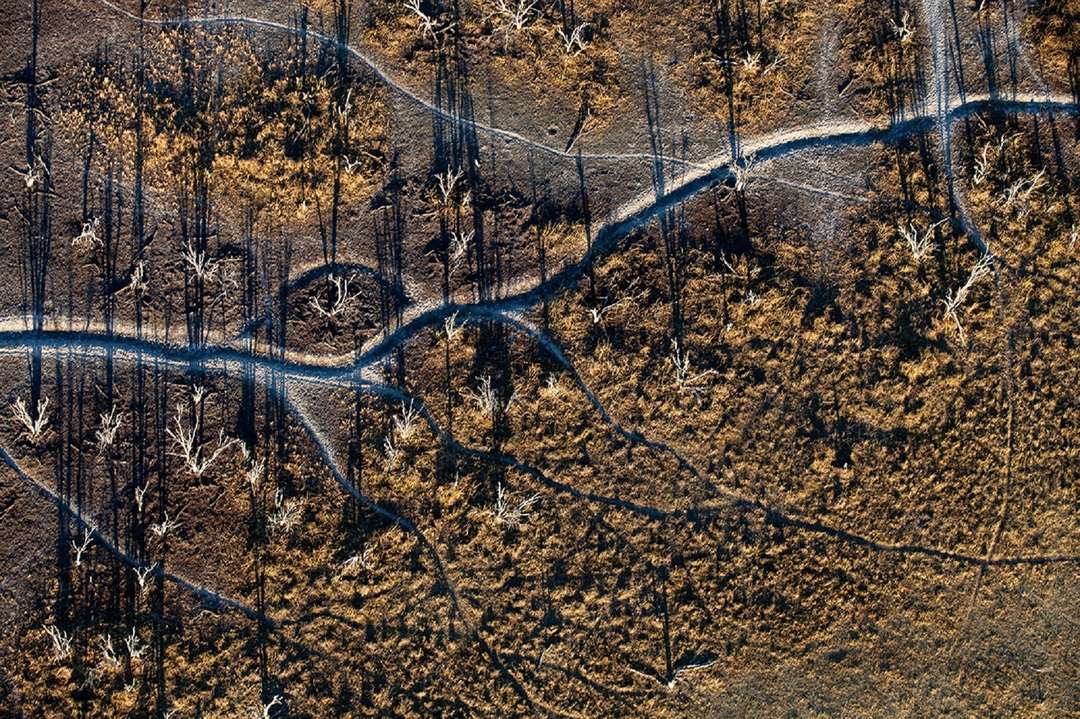
"A path well travelled" by Robyn Currell
The last step is to use stitching software. You should be able to find a few options online, but both Photoshop and Lightroom are perfect for this process.
Hopefully these few tips will allow you to take some great landscape photos. We do not have to be professional photographers to share those WOW moments when we return home. A few simple rules go a long way.
More to discover

Mastering safari photography: 6 tips & tricks from the pros
Learn how to master your safari camera gear with expert advice on settings, angles, lighting, and co...
Read moreLauren Dold
04.03.2024
A portrait of the predators at Wilderness Chitabe
Photography on safari at Wilderness Chitabe - a wildlife wonder in Botswana from feisty felines to A...
Read moreWilderness Blogger
19.07.2023

Botswana: Through the lens
From the iconic Okavango Delta to the remote Mababe to the teeming Linyanti, see Botswana’s wildlife...
Read moreJanine Avery
11.07.2023

Smartphone photography in the wilderness
Avid photographer or casual shutterbug? Capturing unforgettable safari memories with your smartphone...
Read moreJanine Avery
10.07.2023
Respectful photography on safari
Learn how to make the most of a photographic safari with Wilderness in a respectful, ethical way.
Read moreLauren Dold
07.07.2023
Let’s plan your next journey
Ready?
When we say we’re there every step of the way, we mean it, literally. From planning the perfect circuit, to private inter-camp transfers on Wilderness Air, and easing you through Customs. We’re with you on the ground, at your side, 24-7, from start to finish. Ready to take the road less travelled? Contact our Travel Designers to plan an unforgettable journey.